Detect and track an object in real-time using a Raspberry Pi, Pan-Tilt HAT, and TensorFlow. Perfect for hobbyists curious about computer vision & machine learning.
Portable computer vision and motion tracking on a budget.
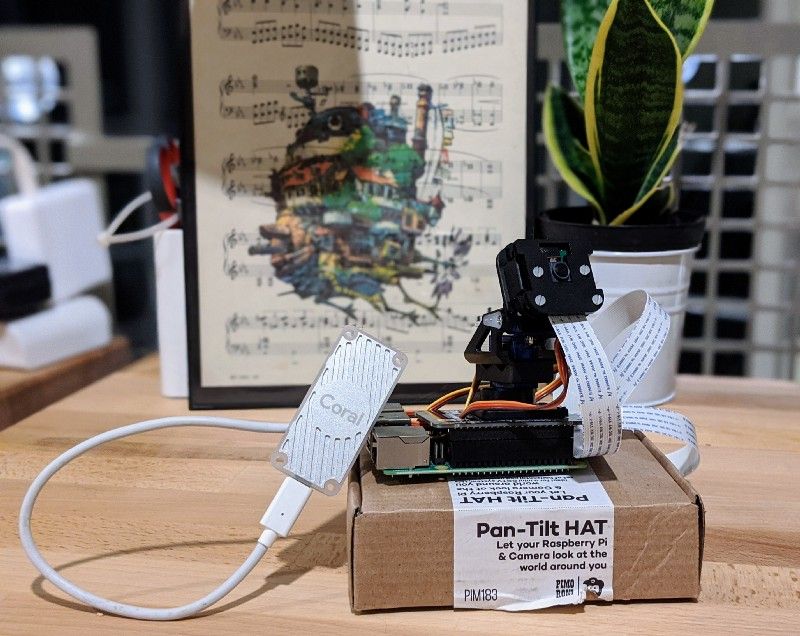
Part 1 — Introduction 👋
Are you just getting started with machine/deep learning, TensorFlow, or Raspberry Pi? Perfect, this blog post is for you! I created rpi-deep-pantilt as an interactive demo of object detection in the wild. 🦁
UPDATE (February 9th, 2020) — Face detection and tracking added!
I’ll show you how to reproduce the video below, which depicts a camera panning and tilting to track my movement across a room.
I'm just a girl, standing in front of a tiny computer, reminding you most computing problems can be solved by sheer force of will. 💪
— Leigh (@grepLeigh) November 28, 2019
MobileNetv3 + SSD @TensorFlow model I converted #TFLite#RaspberryPi + @pimoroni pantilt hat, PID controller.
Write-up soon! ✨ https://t.co/v63KSJtJHO pic.twitter.com/dmyAlWCnWk
I will cover the following:
- Build materials and hardware assembly instructions.
- Deploy a TensorFlow Lite object detection model (MobileNetV3-SSD) to a Raspberry Pi.
- Send tracking instructions to pan / tilt servo motors using a proportional–integral–derivative controller (PID) controller.
- Accelerate inferences of any TensorFlow Lite model with Coral’s USB Edge TPU Accelerator and Edge TPU Compiler.
Terms & References 📚
Raspberry Pi — a small, affordable computer popular with educators, hardware hobbyists and robot enthusiasts. 🤖
Raspbian — the Raspberry Pi Foundation’s official operating system for the Pi. Raspbian is derived from Debian Linux.
TensorFlow — an open-source framework for dataflow programming, used for machine learning and deep neural learning.
TensorFlow Lite — an open-source framework for deploying TensorFlow models on mobile and embedded devices.
Convolutional Neural Network — a type of neural network architecture that is well-suited for image classification and object detection tasks.
Single Shot Detector (SSD) — a type of convolutional neural network (CNN) architecture, specialized for real-time object detection, classification, and bounding box localization.
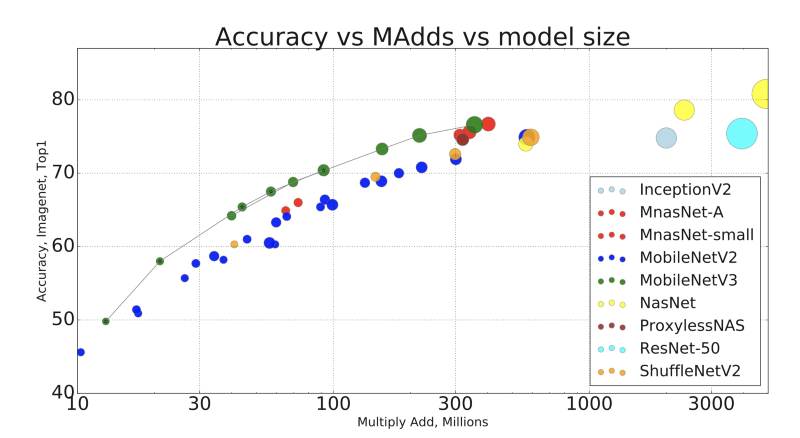
MobileNetV3 — a state-of-the-art computer vision model optimized for performance on modest mobile phone processors.
MobileNetV3-SSD — a single-shot detector based on MobileNet architecture. This tutorial will be using MobileNetV3-SSD models available through TensorFlow’s object detection model zoo.
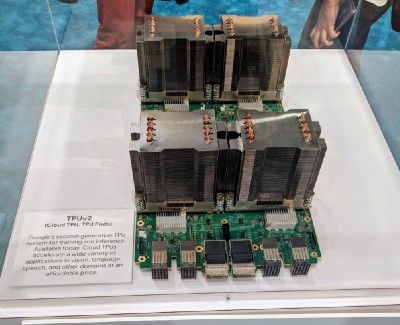
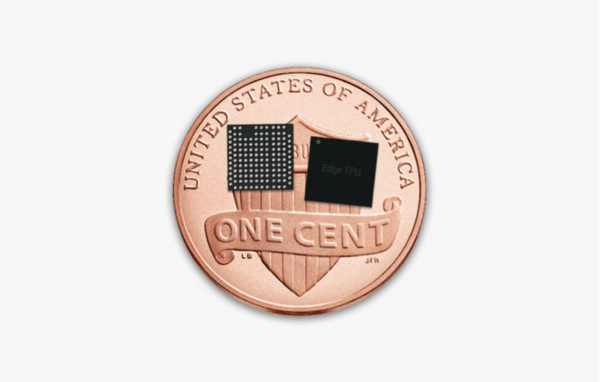
Edge TPU — a tensor processing unit (TPU) is an integrated circuit for accelerating computations performed by TensorFlow. The Edge TPU was developed with a small footprint, for mobile and embedded devices “at the edge”
Part 2— Build List 🛠
Essential
- Raspberry Pi 4 (4GB recommended)
- Raspberry Pi Camera V2
- Pimoroni Pan-tilt HAT Kit
- Micro SD card 16+ GB
- Micro HDMI Cable
Optional
- 12" CSI/DSI ribbon for Raspberry Pi Camera.
The Pi Camera’s stock cable is too short for the Pan-tilt HAT’s full range of motion. - RGB NeoPixel Stick
This component adds a consistent light source to your project. - Coral Edge TPU USB Accelerator
Accelerates inference (prediction) speed on the Raspberry Pi. You don’t need this to reproduce the demo.
👋 Looking for a project with fewer moving pieces?Check out Portable Computer Vision: TensorFlow 2.0 on a Raspberry Pi to create a hand-held image classier. ✨
Part 3 — Raspberry Pi Setup
There are two ways you can install Raspbian to your Micro SD card:
- NOOBS (New Out Of the Box Software) is a GUI operation system installation manager. If this is your first Raspberry Pi project, I’d recommend starting here.
- Write Raspbian Image to SD Card.
This tutorial and supporting software were written using Raspbian (Buster). If you’re using a different version of Raspbian or another platform, you’ll probably experience some pains.
Before proceeding, you’ll need to:
Part 4— Software Installation
- Install system dependencies
$ sudo apt-get update && sudo apt-get install -y python3-dev libjpeg-dev libatlas-base-dev raspi-gpio libhdf5-dev python3-smbus2. Create a new project directory
$ mkdir rpi-deep-pantilt && cd rpi-deep-pantilt3. Create a new virtual environment
$ python3 -m venv .venv4. Activate the virtual environment
$ source .venv/bin/activate && python3 -m pip install --upgrade pip5. Install TensorFlow 2.0 from a community-built wheel.
$ pip install https://github.com/leigh-johnson/Tensorflow-bin/blob/master/tensorflow-2.0.0-cp37-cp37m-linux_armv7l.whl?raw=true6. Install the rpi-deep-pantilt Python package
$ python3 -m pip install rpi-deep-pantiltPart 5 —Pan Tilt HAT Hardware Assembly
If you purchased a pre-assembled Pan-Tilt HAT kit, you can skip to the next section.
Otherwise, follow the steps in Assembling Pan-Tilt HAT before proceeding.
Part 6 — Connect the Pi Camera
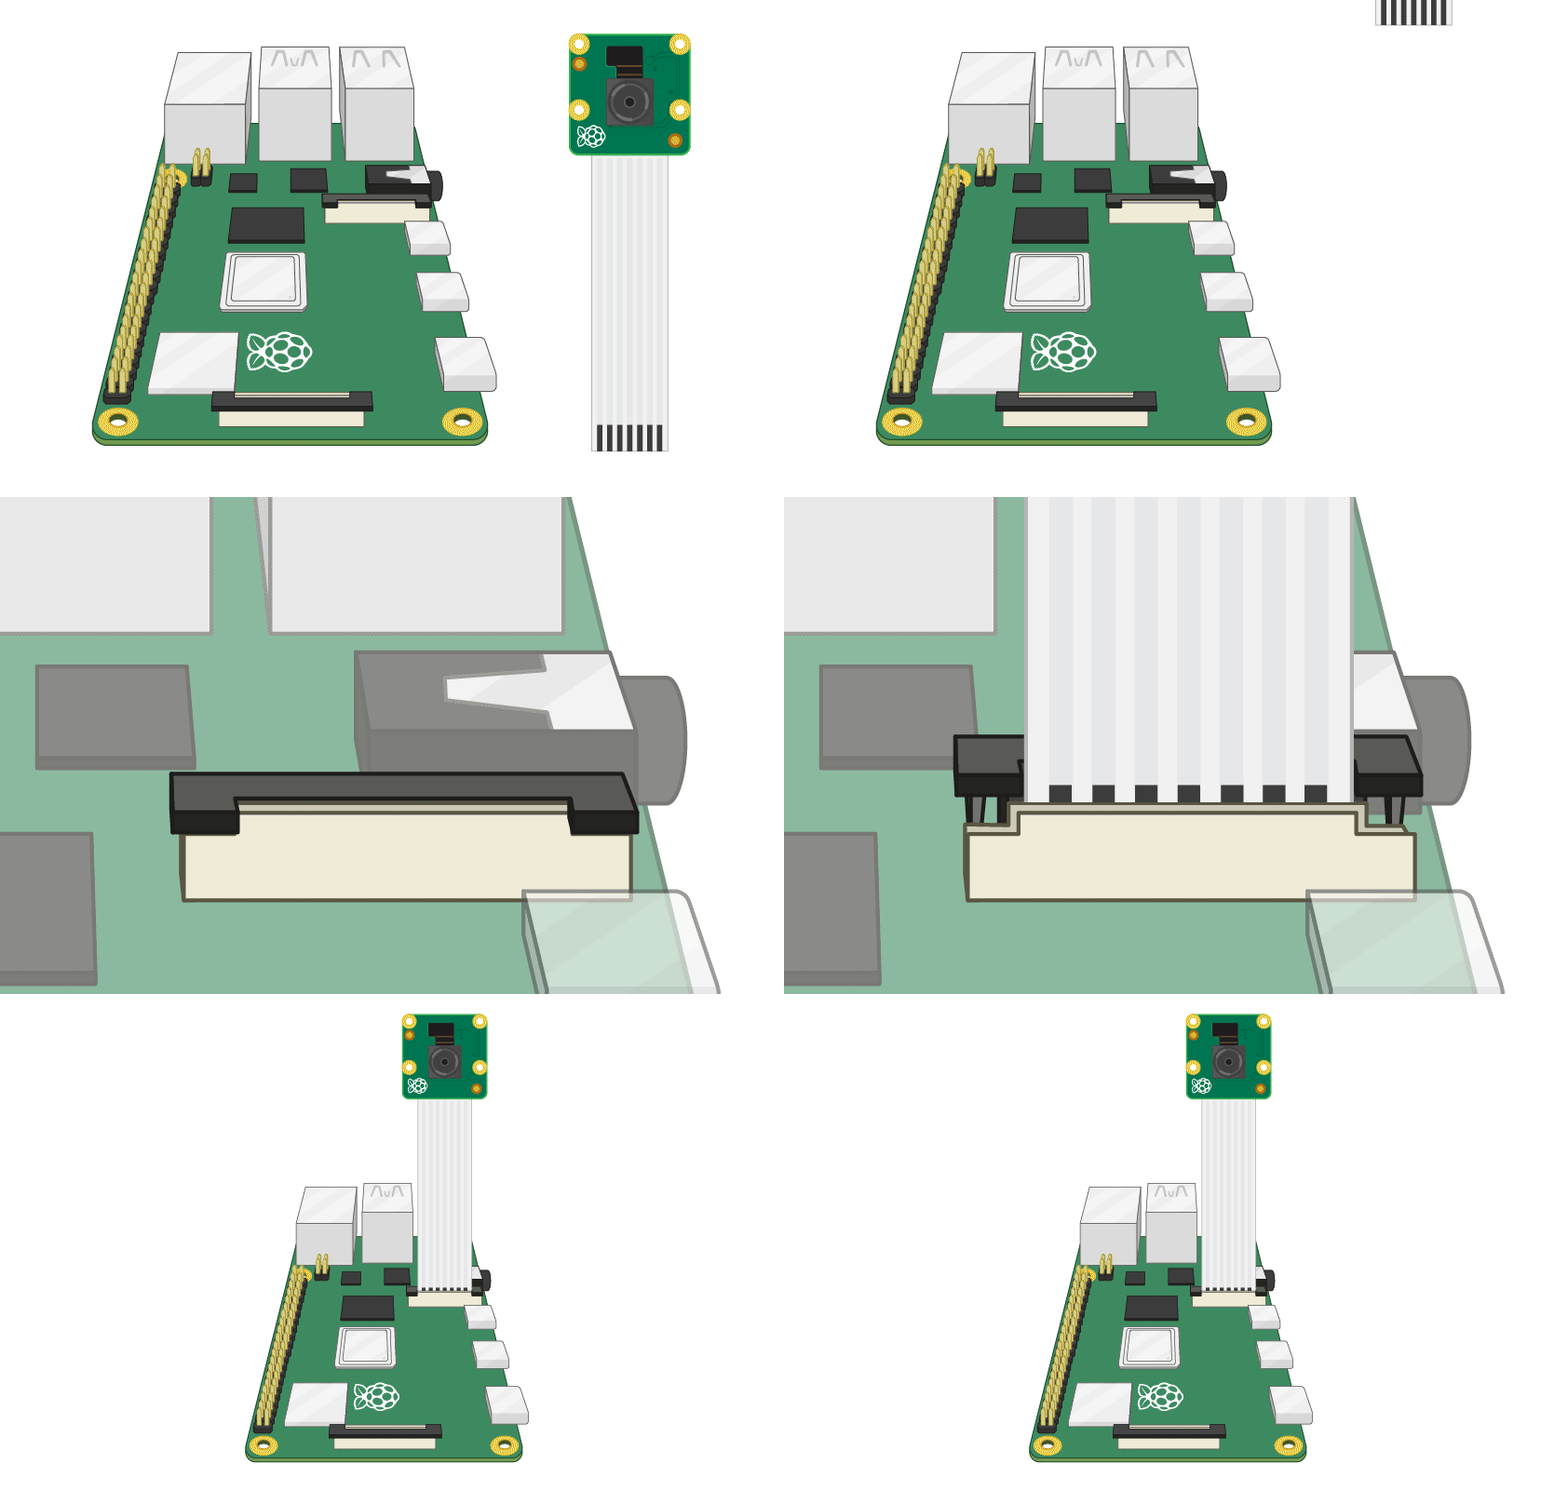
- Turn off the Raspberry Pi
- Locate the Camera Module, between the USB Module and HDMI modules.
- Unlock the black plastic clip by (gently) pulling upwards
- Insert the Camera Module ribbon cable (metal connectors facing away from the ethernet / USB ports on a Raspberry Pi 4)
- Lock the black plastic clip
Part 7 — Enable the Pi Camera
- Turn the Raspberry Pi on
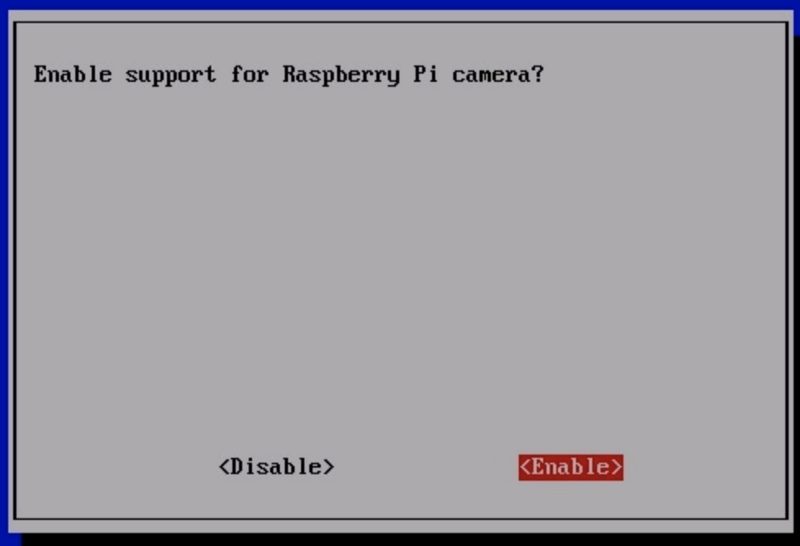
- Run sudo raspi-config and select Interfacing Options from the Raspberry Pi Software Configuration Tool’s main menu. Press ENTER.

3. Select the Enable Camera menu option and press ENTER.

4. In the next menu, use the right arrow key to highlight ENABLE and press ENTER.
Part 8 — Test Pan Tilt HAT
Next, test the installation and setup of your Pan-Tilt HAT module.
- SSH into your Raspberry Pi
- Activate your Virtual Environment: source .venv/bin/activate
- Run the following command: rpi-deep-pantilt test pantilt
- Exit the test with Ctrl+C
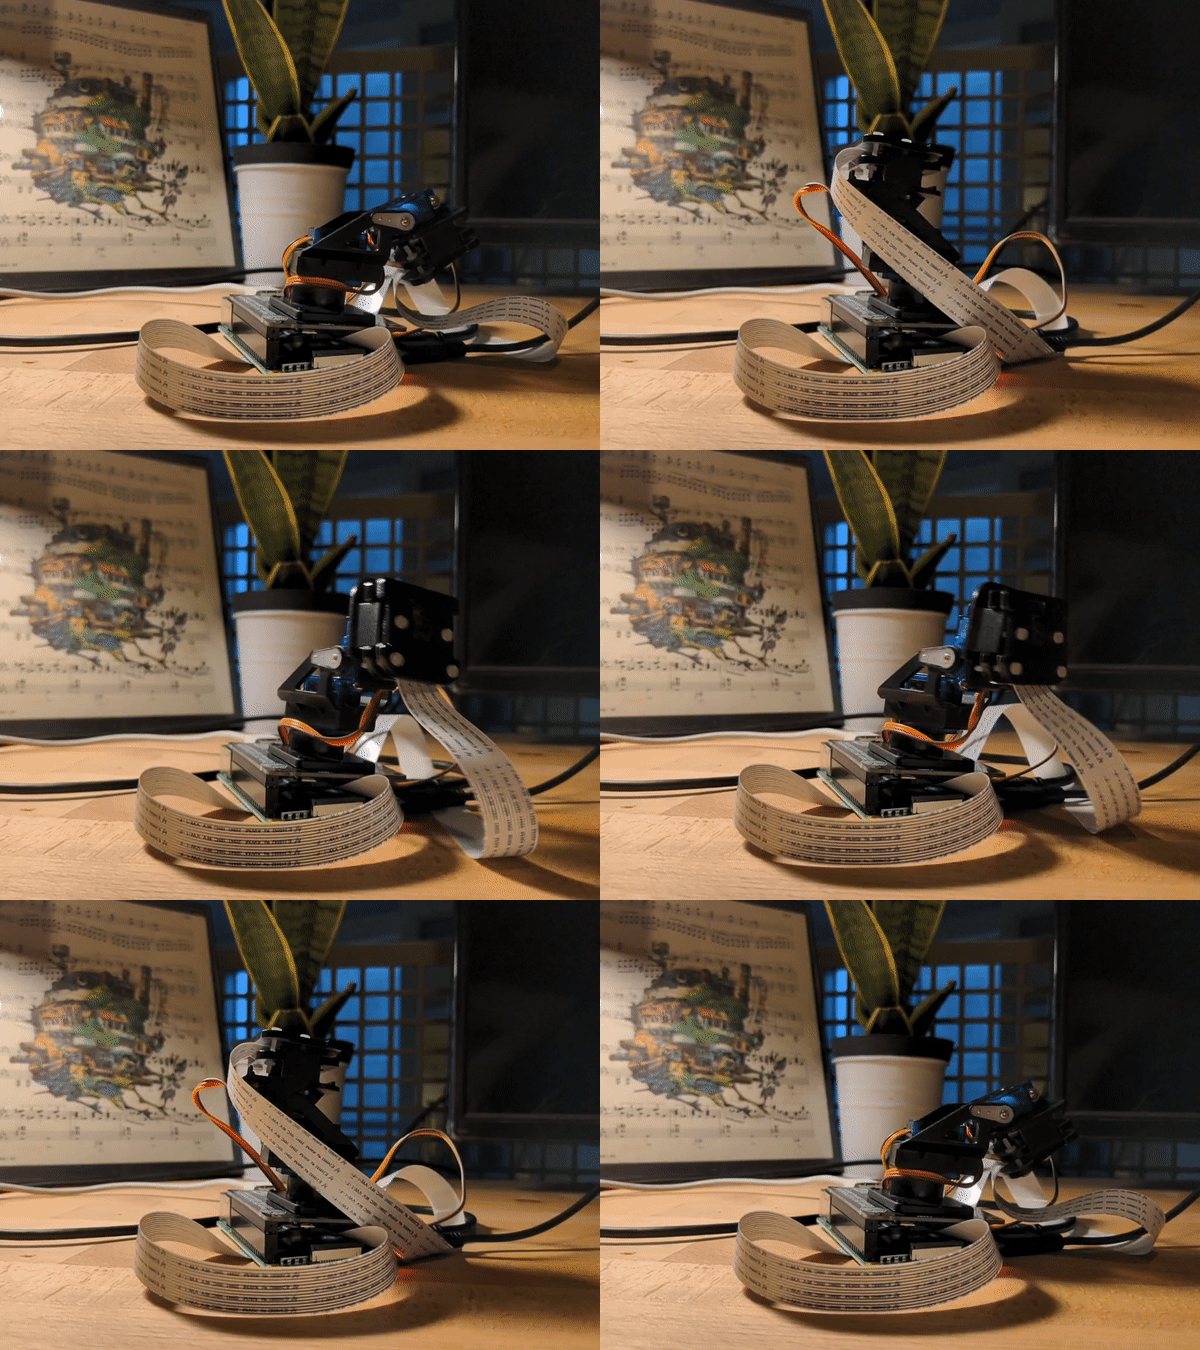
If you installed the HAT correctly, you should see both servos moving in a smooth sinusoidal motion while the test is running.
Part 9 — Test Pi Camera
Next, verify the Pi Camera is installed correctly by starting the camera’s preview overlay. The overlay will render on the Pi’s primary display (HDMI).
- Plug your Raspberry Pi into an HDMI screen
- SSH into your Raspberry Pi
- Activate your Virtual Environment: $ source .venv/bin/activate
- Run the following command: $ rpi-deep-pantilt test camera
- Exit the test with Ctrl+C
If you installed the Pi Camera correctly, you should see footage from the camera rendered to your HDMI or composite display.
Part 10— Test object detection
Next, verify you can run an object detection model (MobileNetV3-SSD) on your Raspberry Pi.
- SSH into your Raspberry Pi
- Activate your Virtual Environment: $ source .venv/bin/activate
- Run the following command:
$ rpi-deep-pantilt detectYour Raspberry Pi should detect objects, attempt to classify the object, and draw a bounding box around it.
$ rpi-deep-pantilt face-detectNote: Only the following objects can be detected and tracked using the default MobileNetV3-SSD model.
$ rpi-deep-pantilt list-labels
[‘person’, ‘bicycle’, ‘car’, ‘motorcycle’, ‘airplane’, ‘bus’, ‘train’, ‘truck’, ‘boat’, ‘traffic light’, ‘fire hydrant’, ‘stop sign’, ‘parking meter’, ‘bench’, ‘bird’, ‘cat’, ‘dog’, ‘horse’, ‘sheep’, ‘cow’, ‘elephant’, ‘bear’, ‘zebra’, ‘giraffe’, ‘backpack’, ‘umbrella’, ‘handbag’, ‘tie’, ‘suitcase’, ‘frisbee’, ‘skis’, ‘snowboard’, ‘sports ball’, ‘kite’, ‘baseball bat’, ‘baseball glove’, ‘skateboard’, ‘surfboard’, ‘tennis racket’, ‘bottle’, ‘wine glass’, ‘cup’, ‘fork’, ‘knife’, ‘spoon’, ‘bowl’, ‘banana’, ‘apple’, ‘sandwich’, ‘orange’, ‘broccoli’, ‘carrot’, ‘hot dog’, ‘pizza’, ‘donut’, ‘cake’, ‘chair’, ‘couch’, ‘potted plant’, ‘bed’, ‘dining table’, ‘toilet’, ‘tv’, ‘laptop’, ‘mouse’, ‘remote’, ‘keyboard’, ‘cell phone’, ‘microwave’, ‘oven’, ‘toaster’, ‘sink’, ‘refrigerator’, ‘book’, ‘clock’, ‘vase’, ‘scissors’, ‘teddy bear’, ‘hair drier’, ‘toothbrush’]
Part 11— Track Objects at ~8 FPS
This is the moment we’ve all been waiting for! Take the following steps to track an object at roughly 8 frames / second using the Pan-Tilt HAT.
- SSH into your Raspberry Pi
- Activate your Virtual Environment: $source .venv/bin/activate
- Run the following command: $ rpi-deep-pantilt track
By default, this will track objects with the label person. You can track a different type of object using the --label parameter.
For example, to track a banana you would run:
$ rpi-deep-pantilt track --label=banana
On a Raspberry Pi 4 (4 GB), I benchmarked my model at roughly 8 frames per second.
INFO:root:FPS: 8.100870481091935
INFO:root:FPS: 8.130448201926173
INFO:root:FPS: 7.6518234817241355
INFO:root:FPS: 7.657477766009717
INFO:root:FPS: 7.861758172395542
INFO:root:FPS: 7.8549541944597
INFO:root:FPS: 7.907857699044301
Part 12— Track Objects in Real-time with Edge TPU
We can accelerate model inference speed with Coral’s USB Accelerator. The USB Accelerator contains an Edge TPU, which is an ASIC chip specialized for TensorFlow Lite operations. For more info, check out Getting Started with the USB Accelerator.
- SSH into your Raspberry Pi
- Install the Edge TPU runtime
$ echo "deb https://packages.cloud.google.com/apt coral-edgetpu-stable main" | sudo tee /etc/apt/sources.list.d/coral-edgetpu.list

$ curl https://packages.cloud.google.com/apt/doc/apt-key.gpg | sudo apt-key add -

$ sudo apt-get update && sudo apt-get install libedgetpu1-std
3. Plug in the Edge TPU (prefer a USB 3.0 port). If your Edge TPU was already plugged in, remove and re-plug it so the udev device manager can detect it.
4. Try the detect command with --edge-tpuoption. You should be able to detect objects in real-time! 🎉
$ rpi-deep-pantilt detect --edge-tpu --loglevel=INFONote: loglevel=INFO will show you the FPS at which objects are detected and bounding boxes are rendered to the Raspberry Pi Camera’s overlay.
You should see around ~24 FPS, which is the rate at which frames are sampled from the Pi Camera into a frame buffer.
INFO:root:FPS: 24.716493958392558
INFO:root:FPS: 24.836166606505206
INFO:root:FPS: 23.031063233367547
INFO:root:FPS: 25.467177106703623
INFO:root:FPS: 27.480438524486594
INFO:root:FPS: 25.41399952505432
5. Try the track command with --edge-tpu option.
$ rpi-deep-pantilt track --edge-tpuPart 13 — Detect & Track Faces (NEW in v1.1.x)
I’ve added a brand new face detection model in version v1.1.x of rpi-deep-pantilt 🎉
The model is derived from facessd_mobilenet_v2_quantized_320x320_open_image_v4 in TensorFlow’s research model zoo.
The new commands are rpi-deep-pantilt face-detect (detect all faces) and rpi-deep-pantilt face-track (track faces with Pantilt HAT). Both commands support the --edge-tpu option, which will accelerate inferences if using the Edge TPU USB Accelerator.
rpi-deep-pantilt face-detect --help
Usage: cli.py face-detect [OPTIONS]

Options:
  --loglevel TEXT  Run object detection without pan-tilt controls. Pass
                   --loglevel=DEBUG to inspect FPS.
  --edge-tpu       Accelerate inferences using Coral USB Edge TPU
  --help           Show this message and exit.
rpi-deep-pantilt face-track --help
Usage: cli.py face-track [OPTIONS]
Options:
--loglevel TEXT Run object detection without pan-tilt controls. Pass
--loglevel=DEBUG to inspect FPS.
--edge-tpu Accelerate inferences using Coral USB Edge TPU
--help Show this message and exit.Wrapping Up 🌻
Congratulations! You’re now the proud owner of a DIY object tracking system, which uses a single-shot-detector (a type of convolutional neural network) to classify and localize objects.
PID Controller
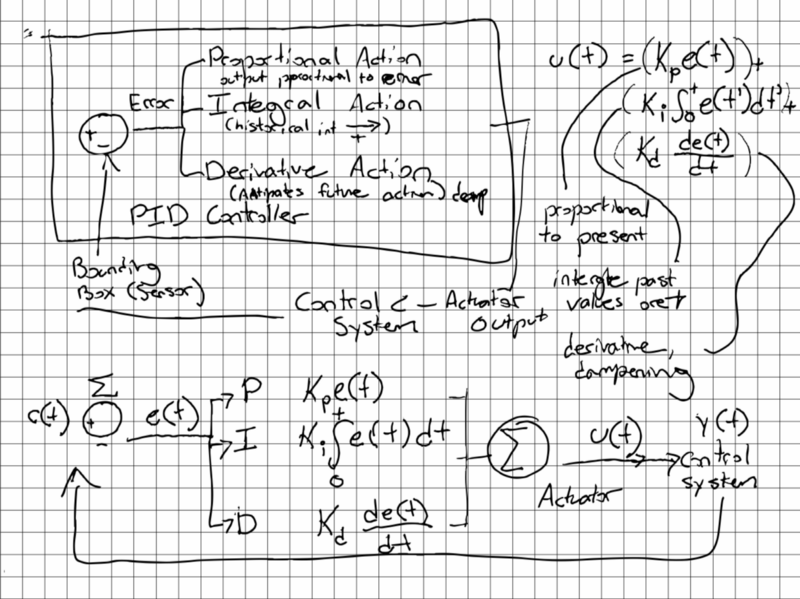
The pan / tilt tracking system uses a proportional–integral–derivative controller (PID) controller to smoothly track the centroid of a bounding box.
TensorFlow Model Zoo
The models in this tutorial are derived from ssd_mobilenet_v3_small_coco and ssd_mobilenet_edgetpu_coco in the TensorFlow Detection Model Zoo. 🦁🦄🐼
My models are available for download via Github releases notes @ leigh-johnson/rpi-deep-pantilt.
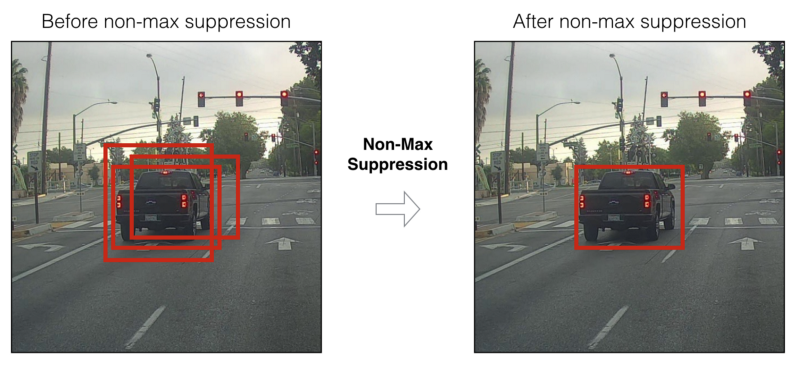
I added the custom TFLite_Detection_PostProcess operation, which implements a variation of Non-maximum Suppression (NMS) on model output. Non-maximum Suppression is technique that filters many bounding box proposals using set operations.
Special Thanks & Acknowledgements 🤗
MobileNetEdgeTPU SSDLite contributors: Yunyang Xiong, Bo Chen, Suyog Gupta, Hanxiao Liu, Gabriel Bender, Mingxing Tan, Berkin Akin, Zhichao Lu, Quoc Le.
MobileNetV3 SSDLite contributors: Bo Chen, Zhichao Lu, Vivek Rathod, Jonathan Huang.
Special thanks to Adrian Rosebrock for writing Pan/tilt face tracking with a Raspberry Pi and OpenCV, which was the inspiration for this whole project!
Special thanks to Jason Zaman for reviewing this article and early release candidates. 💪
