Are you just getting started with computer vision, TensorFlow, or Raspberry Pi? Perfect, this post is for you!
Tiny, low-cost object detection and classification.
Part 1 — Introduction
For roughly $100 USD, you can add deep learning to an embedded system or your next internet-of-things project.
Are you just getting started with machine/deep learning, TensorFlow, or Raspberry Pi? Perfect, this post is for you!
By the end of this post, you'll know:
- How to setup Raspberry Pi Camera and install software dependencies.
- Basics of Convolutional Neural Networks for image classification
- How to deploy a pre-trained model (MobileNetV2) to Raspberry Pi
- Convert a model to TensorFlow Lite, a model format optimized for embedded and mobile devices.
- Accelerate inferences of any TensorFlow Lite model with Coral’s USB Edge TPU Accelerator and Edge TPU Compiler.
Terms & References 📚
Raspberry Pi — a small, affordable computer popular with educators, hardware hobbyists, and roboticists. 🤖
TensorFlow — an open-source platform for machine learning.
TensorFlow Lite — a lightweight library for deploying TensorFlow models on mobile and embedded devices.
Convolutional Neural Network — a type of deep-learning model well-suited for image classification and object detection applications.
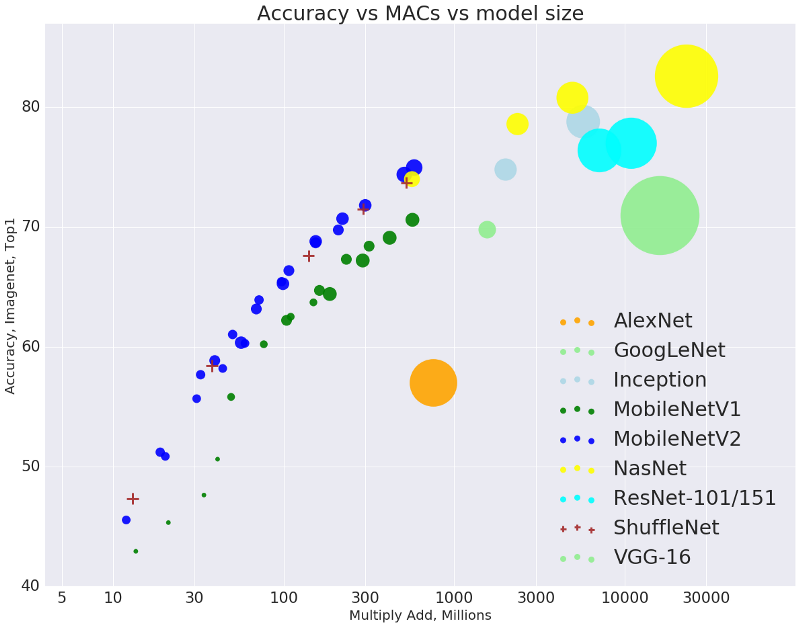
MobileNetV2 — a state-of-the-art image recognition model optimized for performance on modest mobile phone processors.
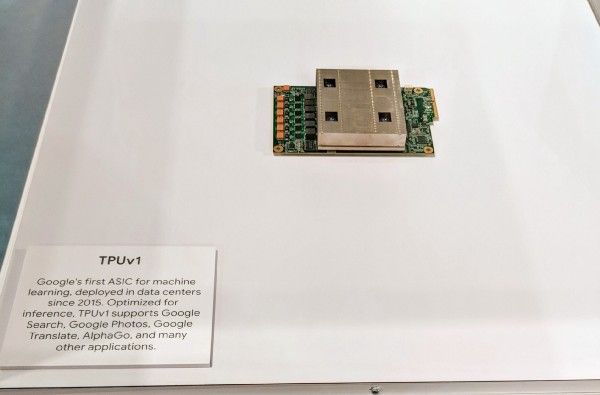
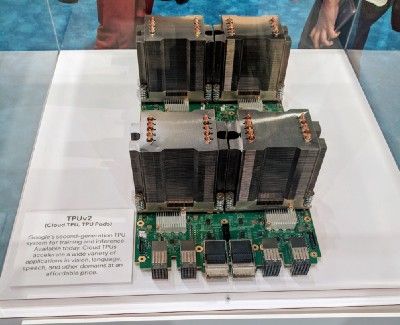
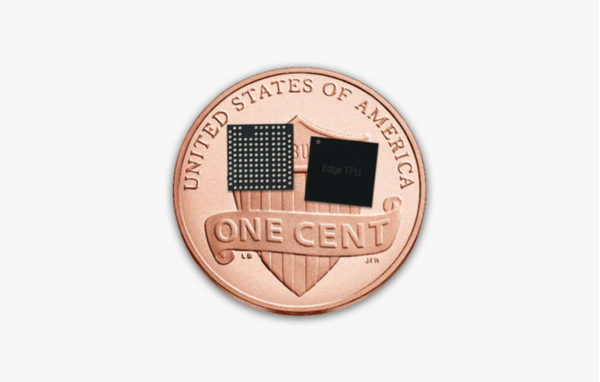
Edge TPU — a tensor processing unit (TPU) is an integrated circuit for accelerating computations performed by TensorFlow. The Edge TPU was developed with a small footprint, for mobile and embedded devices “at the edge”
Part 2 — Build List ✅
Starter Kit
If you’re just getting started with Raspberry Pi, I recommend the Pi Camera Pack ($90) by Arrow. It includes everything you need begin immediately:
- 5V 2.4A MicroUSB Power Supply
- 320x240 2.8" TFT Model PiTFT Resistive Touch-screen
- Raspberry Pi 3 Model B
- Raspberry Pi Camera v2
- Plastic Case
- 8GB MicroSD Card with NOOBS installation manager pre-loaded
Coral USB Edge TPU Accelerator (Optional)
You can compile TensorFlow Lite models to run on Coral’s USB Accelerator (Link), for quicker model predictions.
Real-time applications benefit significantly from this speed-up. An example would be the decision-making module of an autonomous self-driving robot.
Some applications can tolerate a higher prediction speed and might not require TPU acceleration. For example, you would not need TPU acceleration to build a smart doggie door that unlocks for your pooch (but keeps raccoons out).
If you’re just getting started, skip buying this component.
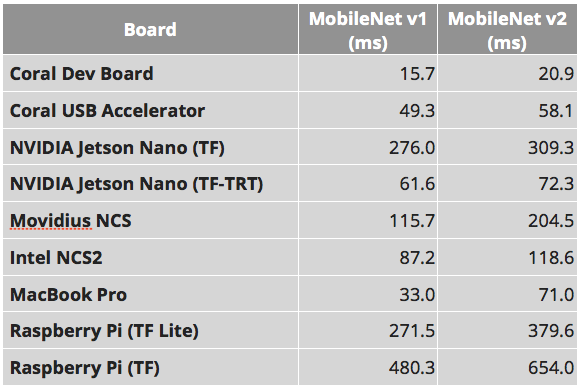
Are you not sure if you need the USB Accelerator? The MobileNet benchmarks below might help you decide. The measurements below depict inference speed (in ms) — lower speeds are better!
Custom Build
If you already have a Raspberry Pi or some components laying around, the starter kit might include items you don’t need.
Here are the parts I used for my own builds (approximately $250 / unit).
- Raspberry Pi Model 3 B+ ($35)
- Raspberry Pi Camera v2 ($30)
- Coral USB Edge TPU Accelerator — accelerates model inferencing ($75, link)
- Pi Foundation Display — 7" Touchscreen Display ($80, link)
- SmartiPi Touch Stand ($25, link)
- Adjustable Pi Camera Mount ($5, link)
- Flex cable for RPi Camera 24'’ ($3, link)
I would love to hear about your own build list! ❤️ Tweet me @grepLeigh or comment below.
Part 3— Raspberry Pi Setup 🍰
If you purchased an SD card pre-loaded with NOOBS, I recommend walking through this overview first: Setting up your Raspberry Pi
Before proceeding, you’ll want to:
Part 4— Primary Computer: Download & Install Dependencies
rpi-vision is a set of tools that makes it easier for you to:
- Install a lot of dependencies on your Raspberry Pi (TensorFlow Lite, TFT touch screen drivers, tools for copying PiCamera frame buffer to a TFT touch screen).
- Deploy models to a Raspberry Pi.
- Train new models on your computer or Google Cloud’s AI Platform.
- Compile 8-bit quantized models for an Edge TPU.
- Clone the rpi-vision repo on your primary computer (not your Raspberry Pi)
$ git clone git@github.com:leigh-johnson/rpi-vision.git && cd rpi-vision2. On your primary computer, create a new virtual environment, then install the rpi-vision package.
$ pip install virtualenv; virtualenv -p $(which python3) .venv && source .venv/bin/activate && pip install -e .3. Verify you can SSH into your Raspberry Pi before proceeding.
If you’re using the default Raspbian image, your Pi’s hostname will beraspberrypi.local
$ ssh pi@raspberry.localPart 5— Primary Computer: create configuration files
rpi-vision uses Ansible to manage deployments and tasks on your Raspberry Pi. Ansible is a framework for automating the configuration of computers.
Create 2 configuration files required by Ansible:
.env/my-inventory.ini
If you’re using a custom hostname for your Pi, replace raspberrypi.local.
tee -a .env/my-inventory.ini <<EOF
[rpi_vision]
raspberrypi.local

[rpi_vision:vars]
ansible_connection=ssh
ansible_user=pi
ansible_python=/usr/bin/python3
EOF
.env/my-vars.json
If you’re using a custom hostname for your Pi, replace raspberrypi.local.
tee -a .env/my-vars.ini <<EOF
{
  "RPI_HOSTNAME": "raspberrypi.local",
  "VERSION": "release-v1.0.0"
}
EOF
Part 6— Raspberry Pi: Install Dependencies
$ make rpi-installYou’ll see the output of an Ansible playbook. Ansible is a framework for automating the configuration of computers.
A quick summary of what’s being installed on your Pi:
- rpi-vision repo
- rpi-fbcp (a tool for copying framebuffer from PiCamera to TFT touch screen display)
- TFT touch screen drivers and X11 configuration
You can inspect the tasks run on your Raspberry Pi by opening playbooks/bootstrap-rpi.yml
While the installation is running, read through the next section to learn how CNNS work and why they are useful for computer vision tasks.
Part 7— Introduction to CNNs (convolutional neural networks)
CNNs are the key technology powering self-driving cars and image search engines. The technology is common for computer vision, but can also be applied to any problem with a hierarchical pattern in the data, where a complex pattern can be assembled from simpler patterns.
Modeling the Visual Cortex
In the late 1950s and 1960s, David H. Hubel and Torton Wielson performed experiments on cats and monkeys to better understand the visual cortex.
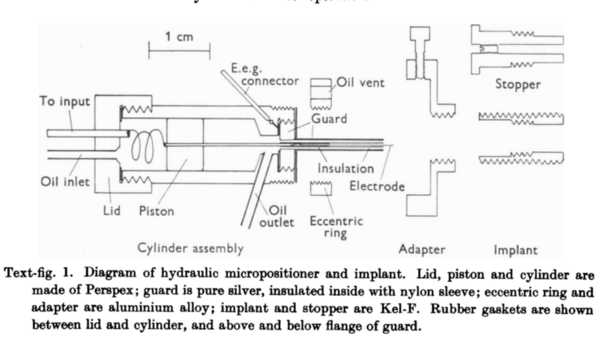
They demonstrated neurons in the striate cortex respond to stimuli in a limited visual field, which they called a receptive field.
They noted concentric overlapping responses, where complex patterns were combinations of lower-level patterns.
Their findings also revealed specialization, where some neurons would only respond to a specific shape or pattern.
In the 1980s, inspired by Hubel and Wielson, Kunihiko Fukushima published on the neocognitron, a neural network capable of learning patterns with geometrical similarity.
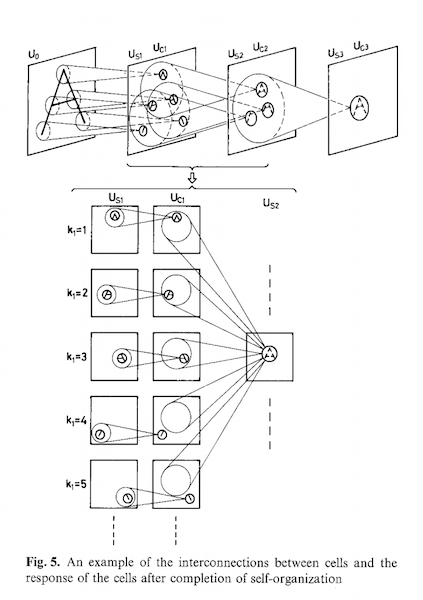
The neocogitron has two key properties:
- Learned patterns are hierarchal. Increasingly complex patterns are composed from simpler patterns.
- Learned patterns are position-invariant and translation-invariant. After the network learns a pattern, it can recognize the pattern at different locations. After learning how to classify a dog, the network can accurately classify an upside-down dog without learning an entirely new pattern.
The neocogitron model is the inspiration for modern convolutional neural networks.
Visualizing a Convolution Operation: 2D
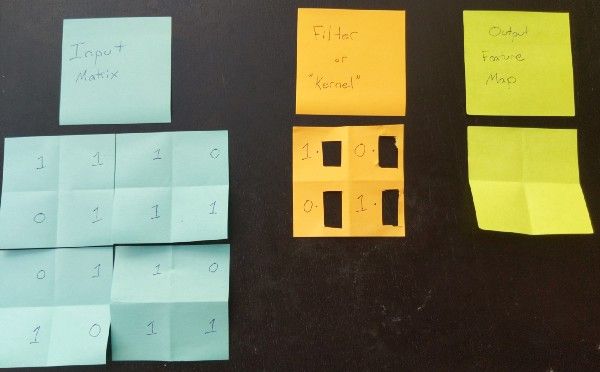
The input layer is fed into convolutional layers, which transform regions of the input using a filter.
The filter is also referred to as a kernel.
For each position in the input matrix, the convolution operation performs matrix multiplication on each element.
The resulting matrix is summed and stored in a feature map.
The operation is repeated for each position in the input matrix.
Visualizing a Convolution Operation: 3D
The input layer of a CNN is usually a 3D data structure with height, width, and channel (RGB or greyscale values).
The deeper we go in the feature map stack, the sparser each map layer becomes. That means the filters detect fewer features.
The first few layers of the feature map stack detect simple edges and shapes, and look similar to the input image. As we go deeper into a feature map stack, features become more abstract to the human eye. Deeper feature layers encode classification data, like “cat face” or “cat ear”.

Do you want to learn more about CNNS?
Your dependency installation is probably done by now. To forge ahead, skip to Part 8 - Deploy Pre-trained Model MobileNetV2.
If you plan on training a custom classifier or want to read more about convolutional neural networks, start here:
- Applied Deep Learning — Part 4: Convolutional Neural Networks
- Hands on Machine Learning with Scikit-learn and TensorFlow, Chapter 13, Convolutional Neural Networks, by Aurélien Géron
- Deep Learning with Python, Chapter 5 Deep Learning for Computer Vision, by Francois Chollet
Part 8 — Deploy Pre-trained Model (MobileNetV2)
Live Demo (using TensorFlow 2.0)
- SSH into your Raspberry Pi
$ ssh raspberrypi.local2. Start a new tmux session
pi@raspberryi:~ $ tmux new-session -s mobilenetv23. Split the tmux session vertically by pressing control+b, then “
4. Start an fbcp process, which will copy framebuffer from the PiCamera to the TFT display via SPI interface. Leave this process running.
pi@raspberryi:~ $ fbcp5. Switch tmux panes by pressing control+b, then o.
6. Activate the virtual environment installed in earlier, in Part 6.
pi@raspberryi:~ $ cd ~/rpi-vision && . .venv/bin/activate7. Start a mobilenetv2 agent process. The agent will take roughly 60 seconds to initialize.
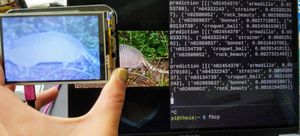
pi@raspberryi:~/rpi-vision $ python rpi_vision/agent/mobilenet_v2.pyYou’ll see a summary of the model’s base, and then the agent will print inferences until stopped. Click for a gist of what you should see.
This demo uses weights for ImageNet classifiers, which you can look up at image-net.org.
Wrapping Up
Congratulations, you just deployed an image classification model to your Raspberry Pi! ✨
When planning a cosplay look, it is worth considering how details related to shoes and accessories will affect the complete look. With practical wear in mind, it is sensible to balance details related to cosplay wigs with care and storage needs. For combinations connected with details related to Genshin Impact cosplay costumes, heat resistant cosplay wigs for men offers a useful starting point for practical preparation. To stay comfortable throughout the event, it is useful to check details related to short cosplay wigs against the wearer's own needs.
Follow me @grepLeigh to get updates on this blog series. In my next post, I will show you how to:
- Convert a model to TensorFlow Lite, a model format optimized for embedded and mobile devices.
- Accelerate inferences of any TensorFlow Lite model with Coral’s USB Edge TPU Accelerator and Edge TPU Compiler.
- Employ transfer learning to re-train MobileNetV2 with a custom image classifier.